
هذا تصفيفة الشعر لطيف جرلي للشعر القصير هو خيار جيد لكل يوم. إنها عملية وجميلة ومناسبة في أي من مظهرك غير الرسمي. مشكلة واحدة مع الانفجارات الطويلة الشائعة اليوم هي أنها تواصل السقوط باستمرار في وجهك والذي يمكن أن يكون في بعض الأحيان مشتتًا للغاية ومزعجًا. التقلبات في الانفجارات هي عنصر زخرفي جميل من تصفيفة شعرك الغير رسمية والتي ، في الوقت نفسه ، تعطيك مظهر أنيق.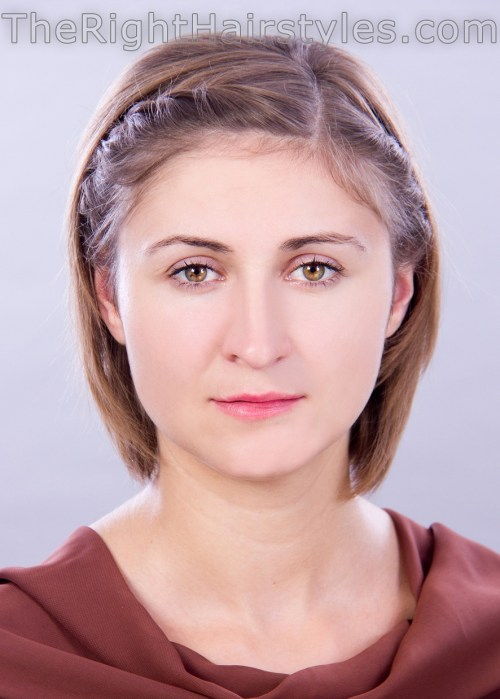
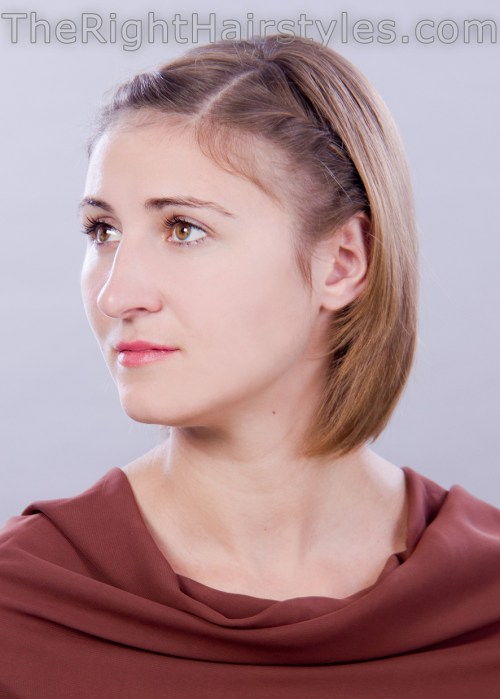
يمكنك ضبط هذه تصفيفة الشعر على أي شكل وجه. يحتوي نموذجنا على وجه مستدير ، وهذا هو السبب في تصميم أقفالها جنبًا إلى جنب. مع الأخذ في الاعتبار أن فاصل المركز يوسع وجهك بشكل مرئي ، فمن السهل أن تستنتج أنه من خلال الوجه الطويل أو البيضاوي ، يمكنك ببساطة تحويل فراقك إلى المركز. إذا كان مربع شعرك مربعاً ، فأنت تحتاج أن تقرب التقلبات إلى الحد الأقصى لنمو شعرك وتضبطه بحيث يغطي زوايا جبينك.
تصفيفة الشعر القصير للشعر الجميل مع الانفجارات الملتوية – خطوة بخطوة تعليمي
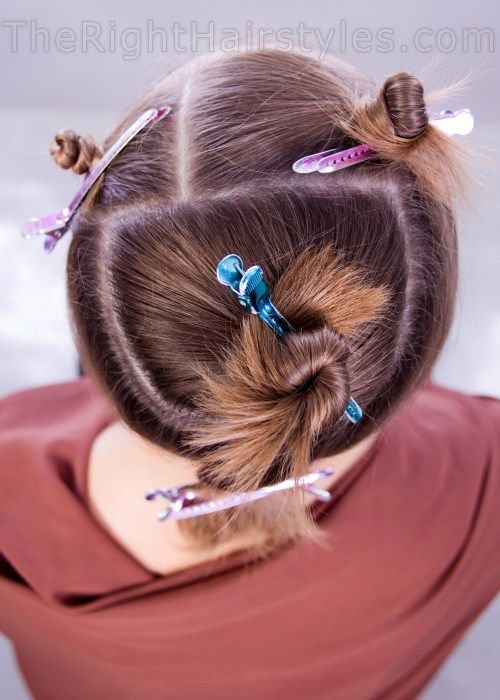
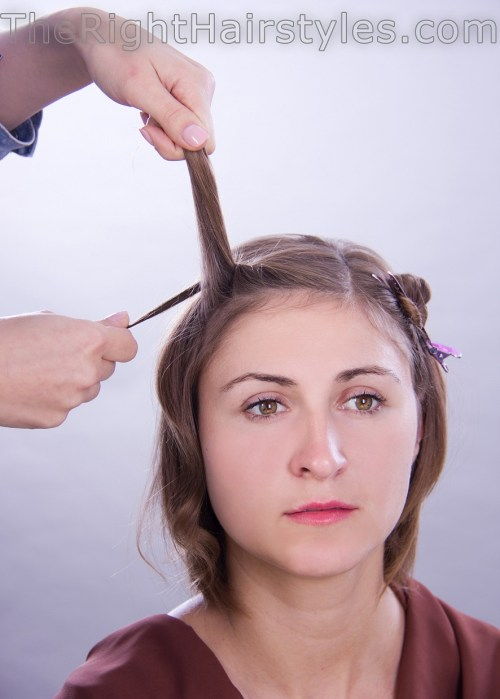
الخطوة 1: تقسيم أقفالك إلى أقسام
قبل البدء في تصميم أقفال سيارتك ، تحتاج إلى تقسيمها إلى أقسام. إنها خطوة ضرورية حتى للشعر الناعم. يساعدك القسم على إدارة أقفالك بكفاءة أكبر وتعزيز النتيجة النهائية. استخدام مشط ذيل الجرذ لتقسيم سريع وبدون عناء. صنعنا 4 أقسام: قسم القفا ، قسم التاج و 2 أقسام المعبد مع فراق جانبي بينهما.
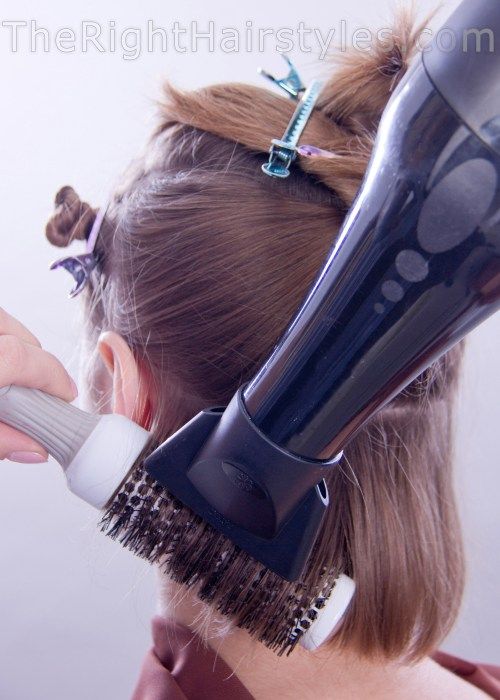
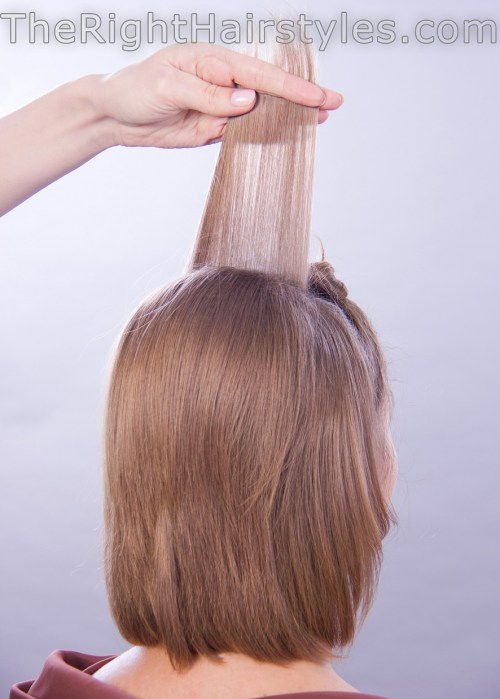
الخطوة 2: ضربة جافة أقفال الخاص بك
إعداد قاعدة تسريحتك ، ضربة تجفيف شعرك خطوة بخطوة ، وذلك باستخدام فرشاة مستديرة تنفيس. تبدأ من أدنى tresses لقسم القفا وتصعد نحو التاج. لتحقيق حجم الجودة ، تحتاج إلى التأكد من أن الأقفال التي تحصل عليها تتكرر منحنى طبيعي لرأسك.
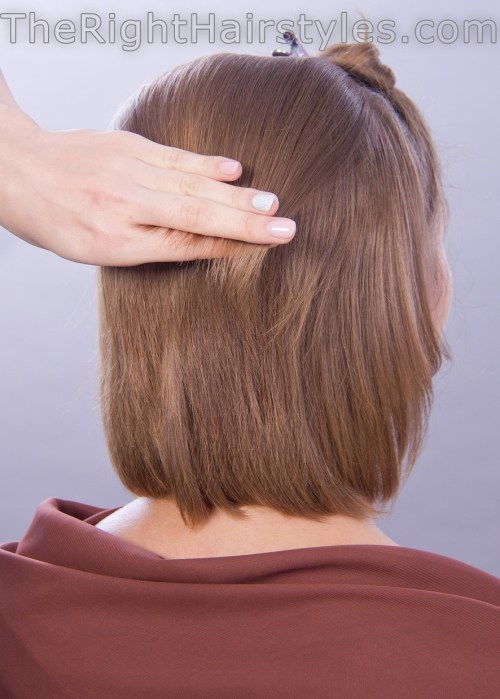
الخطوة 3: نمط قسم التاج
قم بنفس التصميم لقسم التاج كما فعلت من أجل القفا. بعد ذلك ، ابدأ في backcomb locks على التاج: قم بإزالة شريط أفقي في منتصف رأسك وخلفك الخلفي ، باستخدام مشط مسطح ، ثم خذ خيطًا آخرًا فوقه وأعده مرة أخرى بنفس الطريقة. تم إعادة تشكيل الحافة العلوية من قسم التاج قليلاً وتنعيمها لتغطية الأغطية الخفيفة التي حققناها.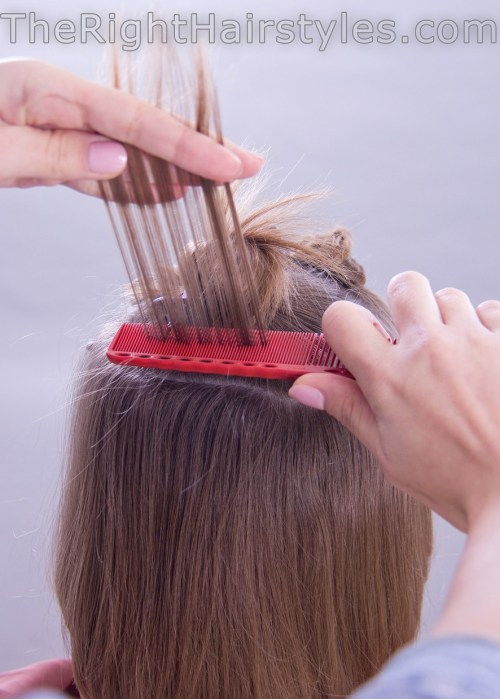

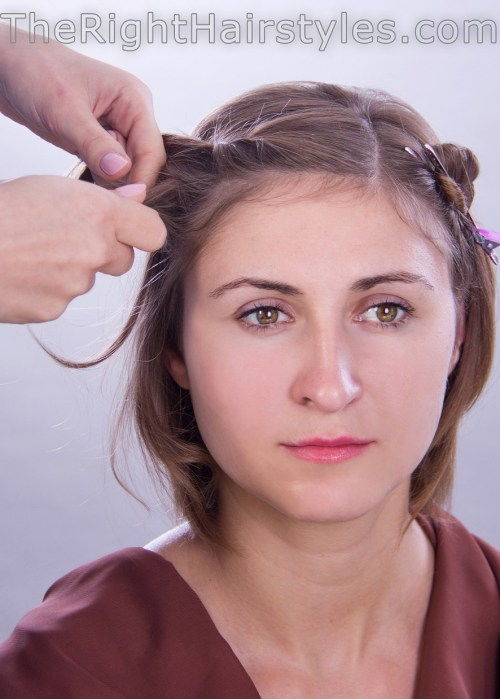
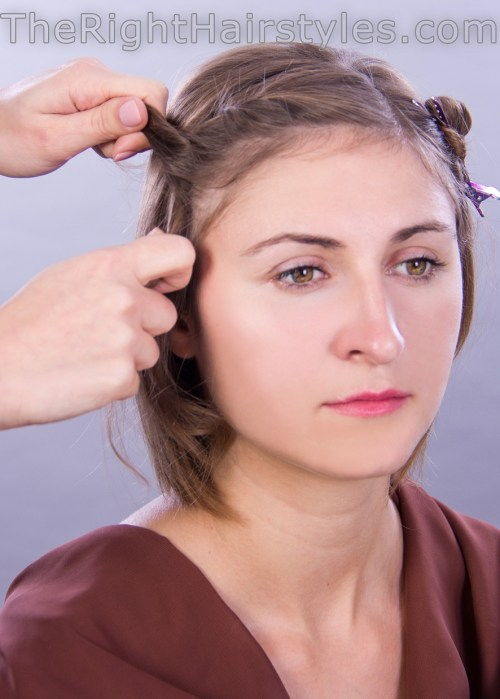
الخطوة 4: جعل اللفات
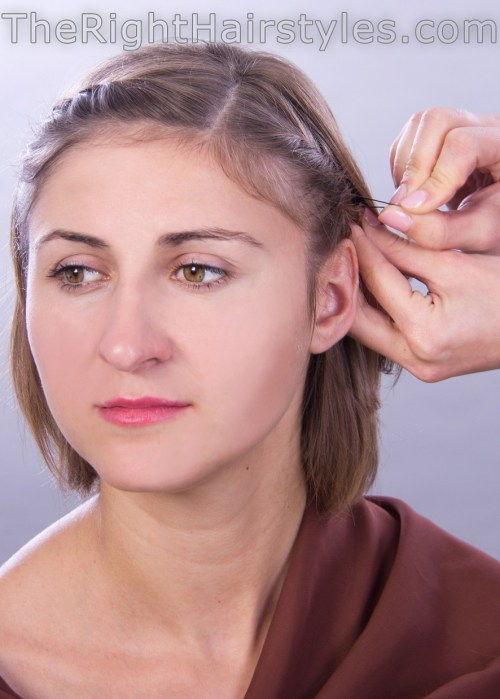
نصبت مناطق المعبد في التقلبات. لإضفاء لمسة لطيفة تحافظ على شكلها وموقعها في تصفيفة الشعر ، ستحتاج إلى تحريك شريحتين ، التقاط شريط رفيع جديد وإضافته إلى واحد من الاثنين بعد كل تطور تقوم به. بعد الانتهاء من أول تطور ، قم بإصلاحه باستخدام دبوس بوبي وإخفاء نهايته تحت الأقفال. كرر الإجراء للتطور الآخر.
الخطوة 5: إصلاح النتيجة
إذا كنت قد فعلت كل شيء بشكل صحيح ، فإن شكل الشعر سيحافظ على شكله جيدًا ، ولكن يسمى رذاذ الشعر لتعزيز متانته.
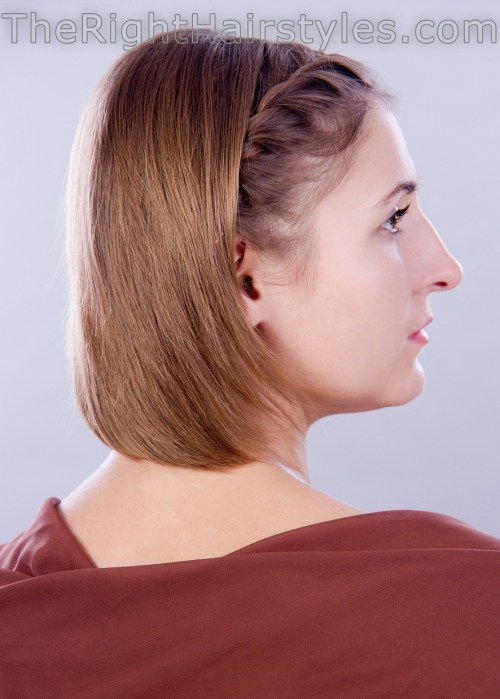
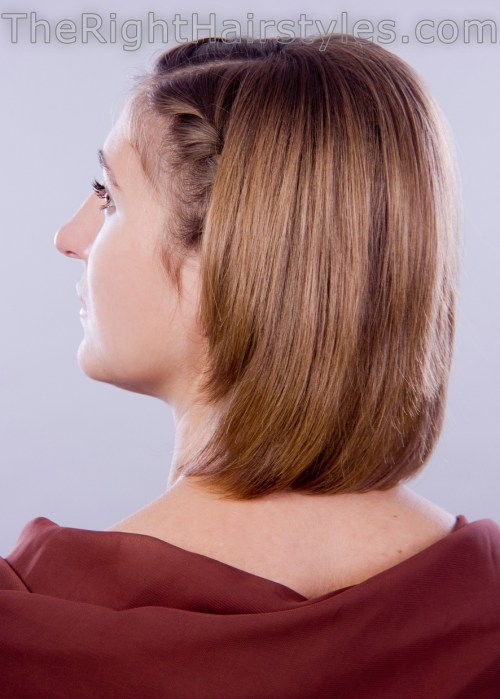
هنا تأتي نتيجة عملنا: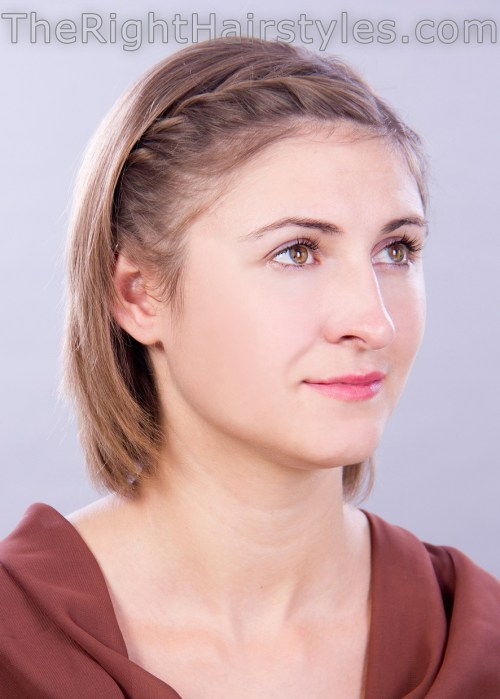
أنا شخصياً أحب تصفيفة الشعر هذه لبساطتها وإحساسها اللامبالئ. أستطيع أن أتخيل أنها هزت فتاة عمرها 5 سنوات وكذلك من قبل والدتها. إذا كنت تحب هذه الفكرة ، يرجى تثبيت برنامج Hair Tutorial هذا في Pinterest ، وإيجاد 15-30 دقيقة لإكمال ‘do في المستقبل القريب.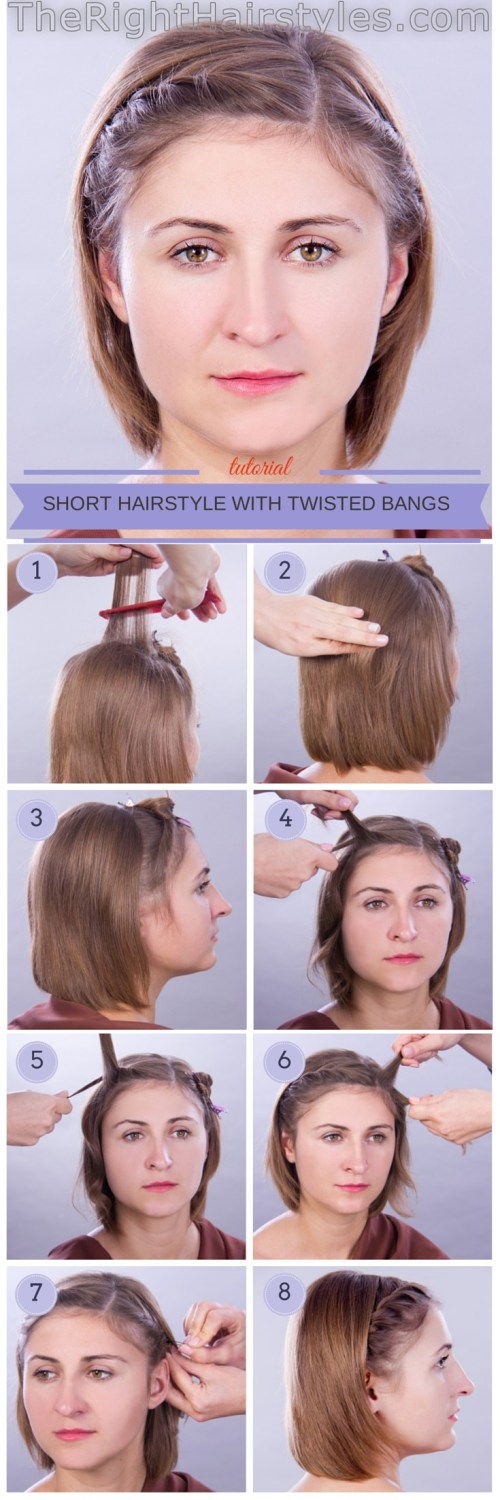
This is a cute girly hairstyle for short hair that is a good choice for everyday wear. It is simple, beautiful, and suitable for any casual look. One problem with long bangs that are common today is that they constantly fall in your face, which can be distracting and annoying. Twists in the bangs are a beautiful decorative element of your casual hairstyle that, at the same time, gives you a stylish look. You can adjust this hairstyle to any face shape. Our model has a round face, which is why her locks are designed side by side. Considering that the center part visually widens your face, it is easy to conclude that, with a long or oval face, you can simply turn your part to the center. If your hair is square, you need to bring the twists to the maximum growth of your hair and adjust it to cover the corners of your forehead. The short hairstyle for beautiful hair with twisted bangs – step-by-step tutorial Step 1: Divide your locks into sections Before starting to design your locks, you need to divide them into sections. It is a necessary step even for soft hair. The section helps you manage your locks more efficiently and enhance the final result. Use a rat tail comb for quick and effortless division. We made 4 sections: the nape section, the crown section, and 2 temple sections with a side part between them. Step 2: Blow-dry your locks Prepare the base of your hairstyle, blow-dry your hair step by step, using a round vent brush. Start from the lowest tresses of the nape section and move up towards the crown. To achieve quality volume, make sure that the locks you get have a natural curve to your head. Step 3: Style the crown section Do the same design for the crown section as you did for the nape. Then, start backcombing locks on the crown: remove a horizontal strip in the middle of your head and behind you, using a flat comb, then take another thread over it and repeat it in the same way. The top edge of the crown section has been slightly reshaped and softened to cover the light covers we achieved. Step 4: Make the twists Erect the temple areas in the twists. To give a nice touch that keeps its shape and position in the hairstyle, you need to move two slices, pick up a new thin strip, and add it to one of the two after each development you make. After finishing