
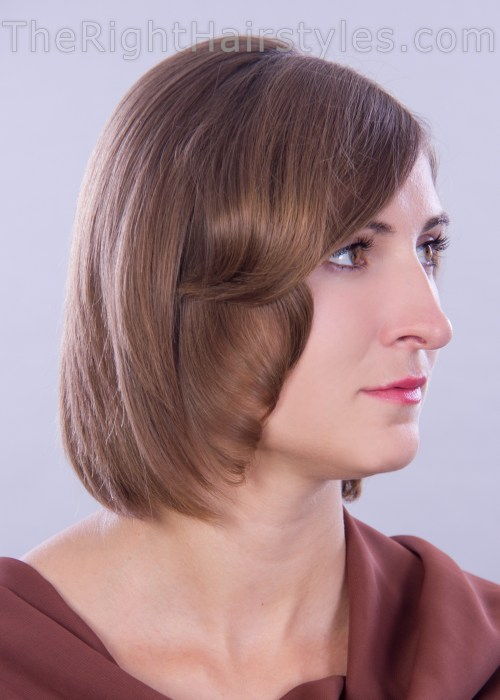
هذه تصفيفة الشعر رائعتين تبدو أنيقة للغاية ويحمل صبغة خفيفة من الذوق خمر. سيكون مناسبًا تمامًا في جميع مظهرك الكلاسيكي الأنيق حيث تحتاج إلى أن تظهر بشكل ثابت ومثير للإعجاب بشكل خاص. إذا كنت فتاة صغيرة جدًا ، فقد يجعلك هذا يبدو أكثر بسنتين من العمر (نموذجنا هو 22). لذا ، إذا كان هدفك ، فلا تتردد في تبني الفكرة. وفي الوقت نفسه ، فإن السيدات الأكبر سنا من 25 عاما ، سوف يبدأن ويشعرن بالانسجام التام ، ويرتدين ملابس قصيرة للغاية. إنها نوع من تصفيفة الشعر التي أشير إليها باسم “الشعر من الشعر”. ويمكنك أن ترى بنفسك كيف يتم الكشف عن الجمال الخفيف لصورته الظاهرة من خلال خطوط تأطير الوجه.
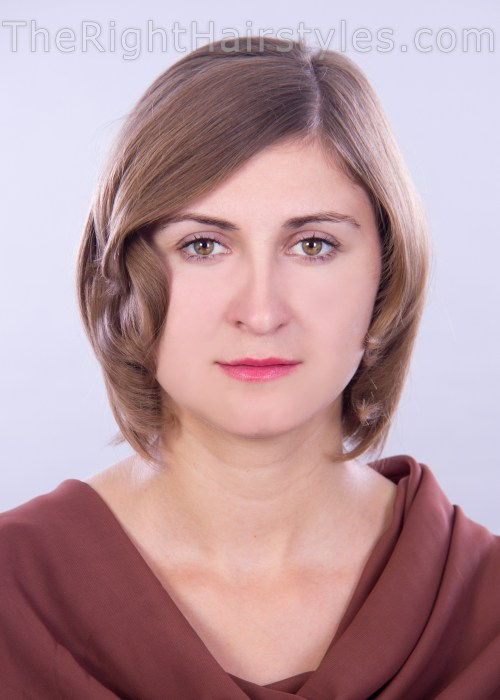
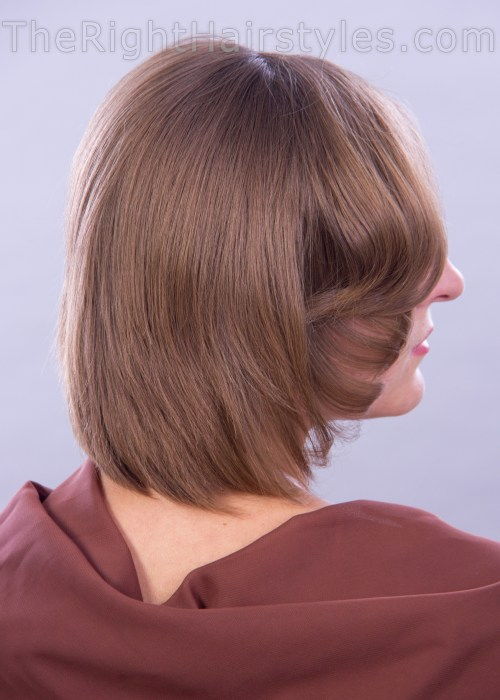
يوصى بتصفيفة الشعر للوجه المستديرة والمربعة. الأقفال الجانبية والأقفال المتعرجة ، التي تغطي الخدين تخفي عرض الوجوه العريضة ، مما يجعلها أقل حجماً بصرياً. وبالتأكيد ، يمكن للسيدات ذوي الوجه البيضاوي أن يختارن هذا “افعل دون تفكير آخر. كيف نفعل ذلك في المنزل؟
قصيرة خطوة بخط تصفيفة الشعر دروس خطوة بخطوة
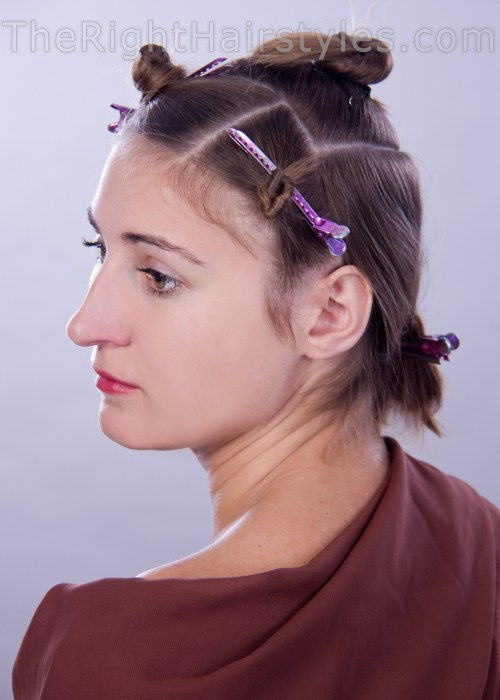
الخطوة 1: تصحيح تجزئة الشعر
لتحقيق جودة التصميم من هذه تصفيفة الشعر الرائعة ، تحتاج إلى البدء مع قسم من أقفال الخاص بك. تجسيد الشعر الصحيح هو ضمان نجاحك ، حتى لو كنت تعمل على تصفيفة الشعر في المنزل. 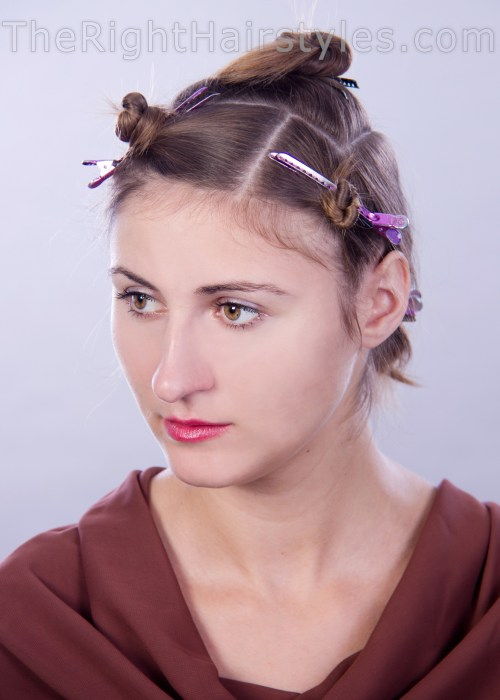
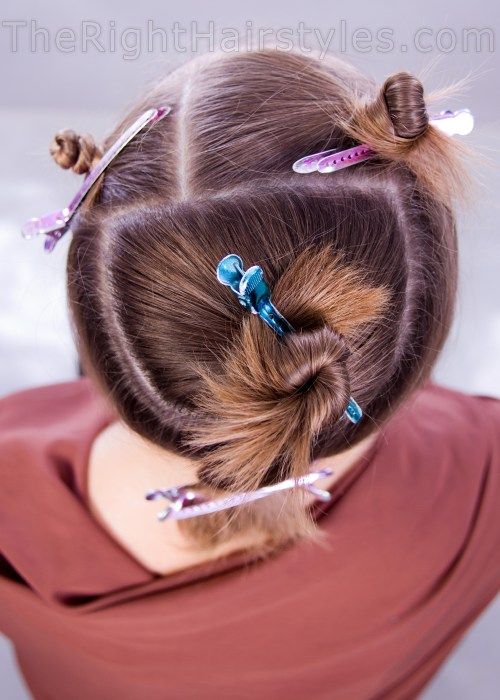
لذلك ، قسّم رأسك إلى الأقسام الأربعة التالية:
- قسم القفا
- تاج على شكل حرف U (يمر أعلى نقطة في رأسك)
- قسمان للمعبد ، مع الأخذ بعين الاعتبار فراقتك الطبيعية (إذا كنت ترتدي فراقًا مركزيًا ، قم بتقسيم أقفالك في المركز ؛ مع وجود فاصل جانبي هناك ، وبالتالي ، تحول إلى اليمين أو إلى اليسار)
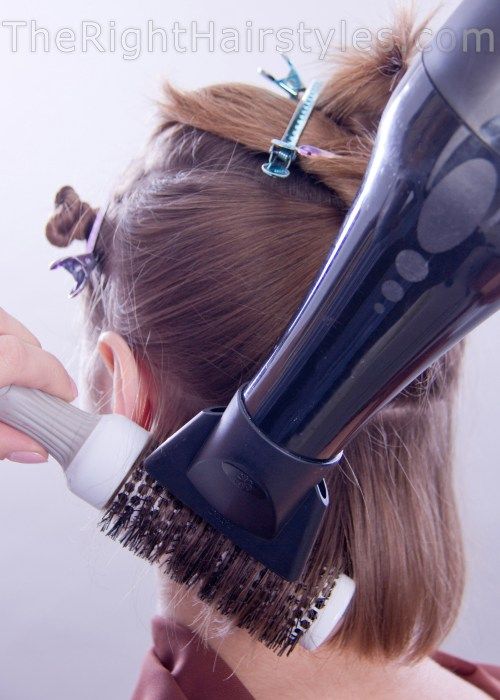
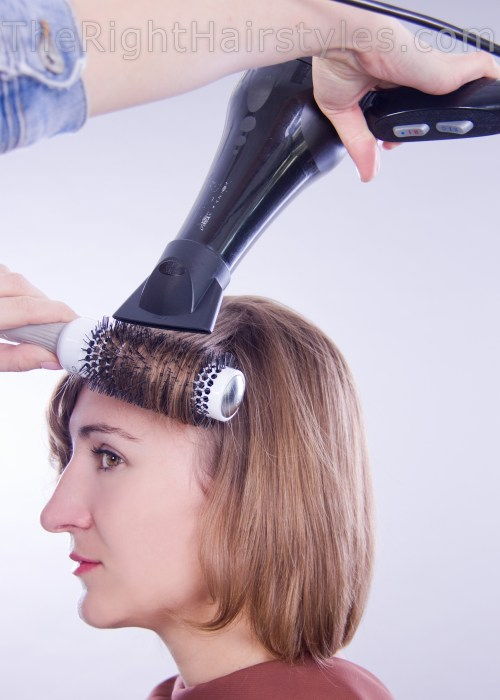
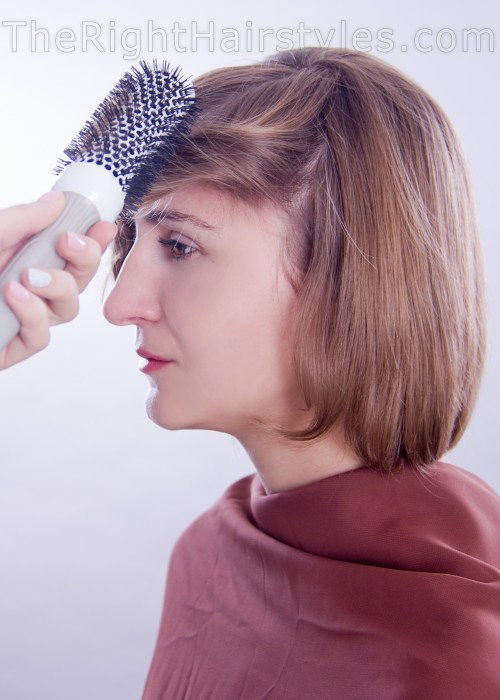
الخطوة 2: التصميم باستخدام مجفف ضربة فرشاة مستديرة تنفيس
ابدأ بسحب أقفالك ، عند التجفيف ، باستخدام فرشاة مستديرة تنفيس. لتنفيذ هذا الإجراء بشكل صحيح ، تحتاج إلى البدء من خط حافة قسم القفا والمضي قدما خطوة بخطوة نحو التاج. عند تجفيف الشعر ، يجب أن تحاكي الفرشاة منحنى رأسك. في هذه الحالة ، ستحصل على تسريحة عالية الجودة. 
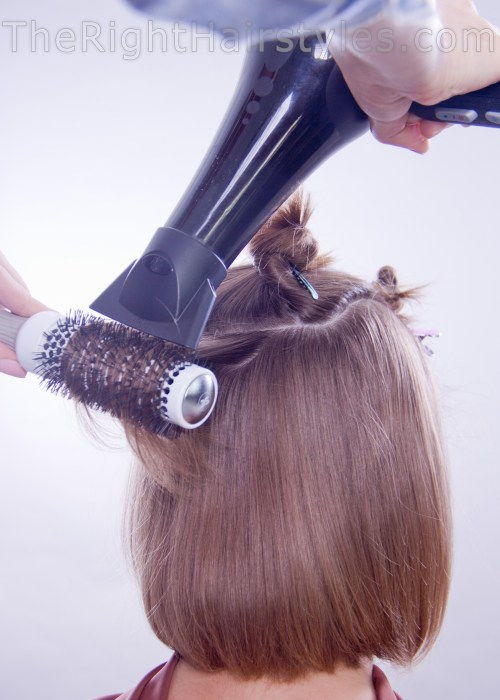
الخطوة 3: قفل قفل حسب التصميم لقسم التاج
قم بتحرير القسم على شكل حرف U ثم قم بتجفيفه باستخدام نفس القفل من حيث القفل.
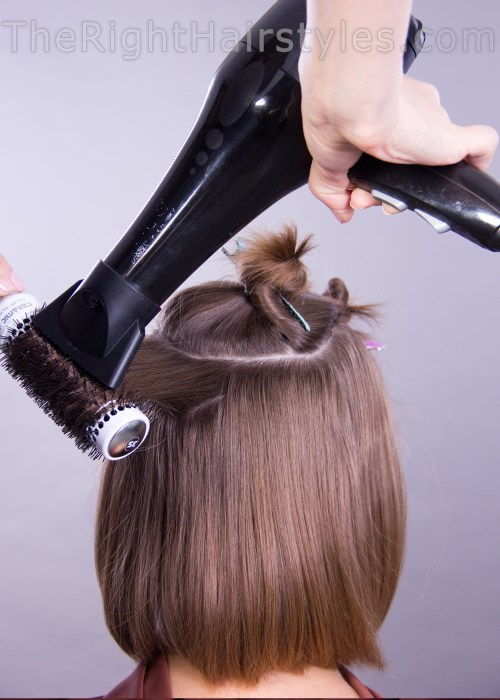
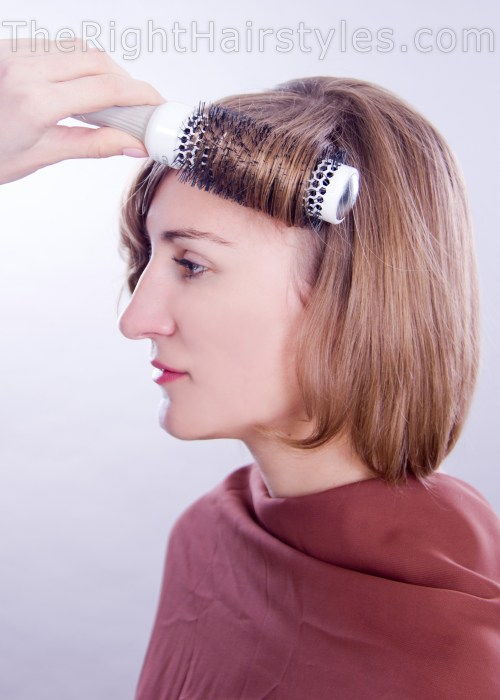
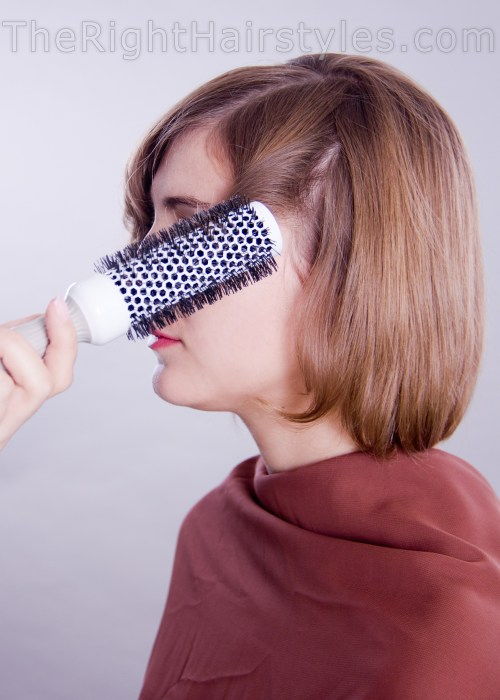
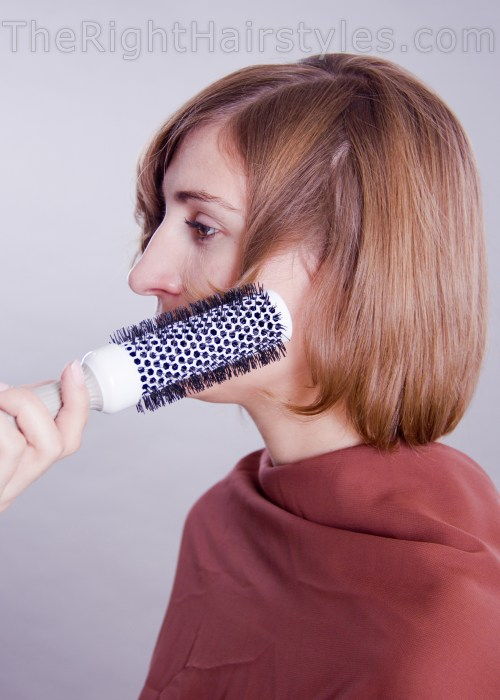
الخطوة 4: تصميم أقفال الوجه – تأطير الوجه
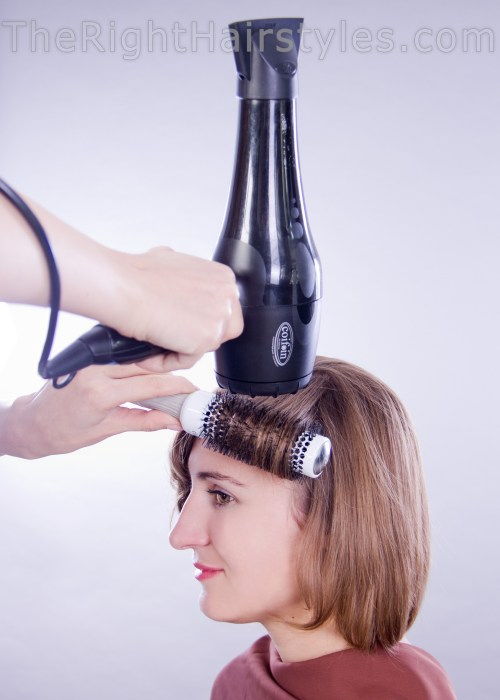
ثم انتقل إلى أقسام المعبد. تجعيد أقفال تأطير الوجه على الفرشاة كما تفعل عند تجعيد شعرك على بكرة الشعر (انظر الصورة). سخني القفل بتدفق الهواء الساخن ، ولإصلاح النتيجة ، قم بمعالجته بالهواء البارد. لمعالجة الأقفال بتدفق الهواء البارد ، تحتاج ببساطة إلى تشغيل مجفّف الشعر الخاص بك رأسًا على عقب ، كما ترى في الصورة. لكن كن حذرا! في حال كنت لا تستخدم مجفف الشعر المهنية ، يمكنك تحقيق نفس التأثير ، الضغط على زر “الهواء البارد”. خلاف ذلك ، سوف يتم شفط شعرك داخل والتشابك داخل الجهاز! 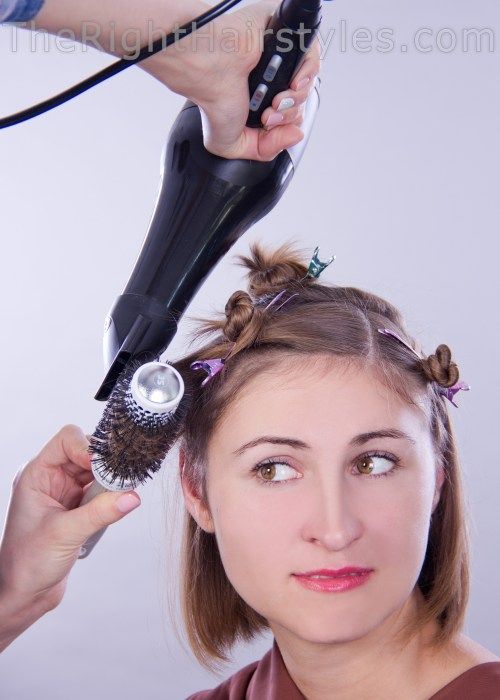
الخطوة الخامسة: النهاية النهائية
المرحلة النهائية هي تطبيق منتج التصميم لإصلاح جميع الأقفال والضفائر في مكانها والحفاظ على شكلها. استخدمنا رذاذ الشعر التركيب الجاف لهذه تسريحة معينة.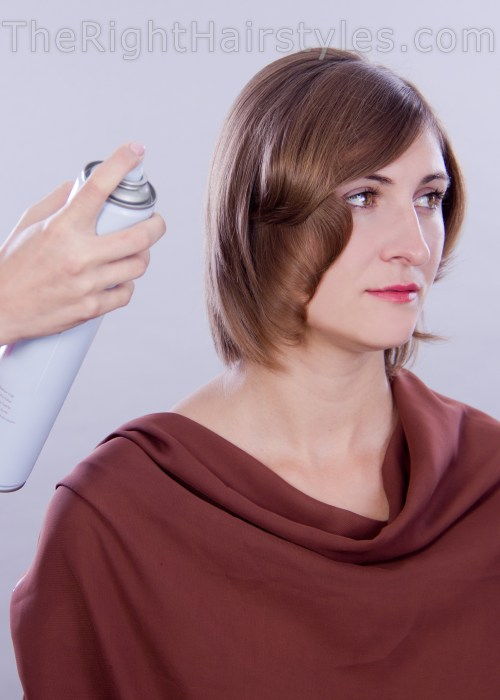
دعونا نرى النتيجة!
أتمنى أن تكون هذه التعليمات ملهمة لك أنت شخصياً ، وسوف تجرؤ على إعادة تصفيفة الشعر في المنزل. إذا كنت ترغب في النتيجة ، فلا تتردد في تثبيت هذا البرنامج التعليمي الشعر في بينتيريست من أجل الحصول عليها في متناول اليد. 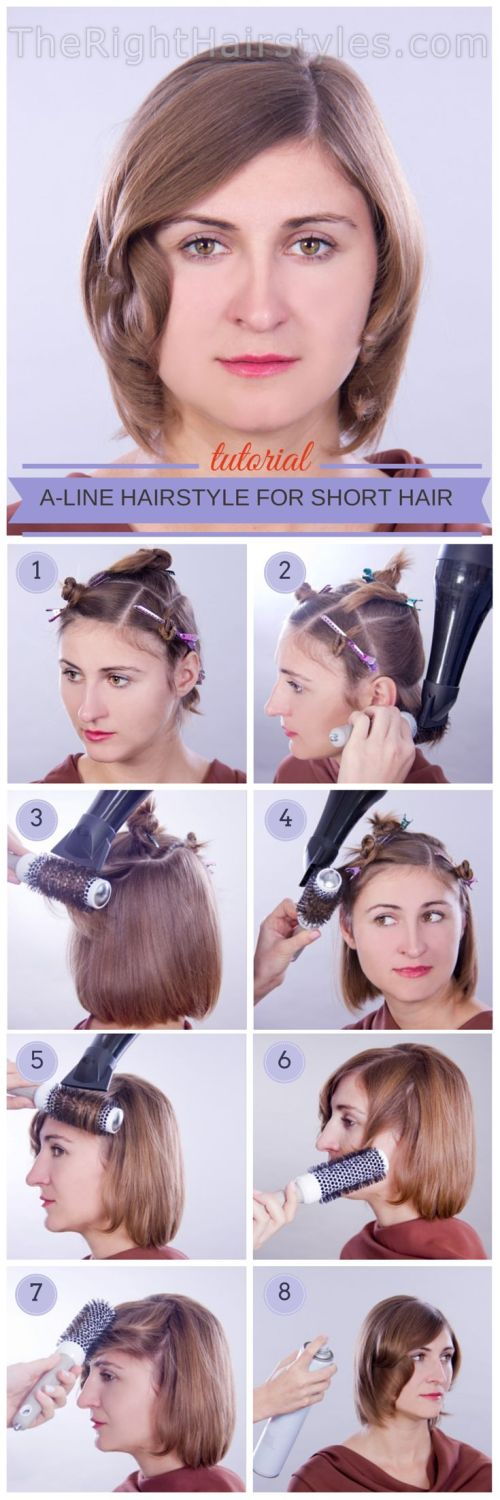
This is a wonderful hairstyle that looks very elegant and carries a light vintage touch. It would be perfect for all your classic and stylish looks where you need to appear consistently and impressively. If you are too young, it may make you look two years older (our model is 22). So, if thats your goal, dont hesitate to adopt the idea. At the same time, older ladies over 25 will start to feel and look perfectly harmonious, wearing very short clothes. Its a kind of hairstyle referred to as “hair from hair”. And you can see for yourself how the light beauty of its visible image is revealed through the lines framing the face. It is recommended for round and square faces. Side locks and curly locks, covering the cheeks, hide the width of wide faces, making them visually smaller. And certainly, ladies with oval faces can choose this “do without further thought”. How do we do it at home? Short step-by-step hair styling lessons Step 1: Correct hair partitioning to achieve the quality of design from this wonderful hairstyle, you need to start with a section of your locks. Proper hair embodiment is the guarantee of your success, even if you are working on a hairstyle at home. So, divide your head into the following four sections: the crown section in the shape of a U (passing over the top point of your head) two sections for the temple, taking into account your natural parting (if you wear a center parting, divide your locks in the center; with a side parting there, turn to the right or left) Step 2: Design using a round brush blow dryer Start pulling your locks, when drying, using a round brush blow dryer. To perform this procedure correctly, you need to start from the edge line of the crown section and move step by step towards the crown. When drying your hair, the brush should mimic the curve of your head. In this case, you will get a high-quality hairstyle. Step 3: Lock by lock design according to the design for the crown section Release the U-shaped section and then dry it using the same lock as the lock. Step 4: Designing face locks – framing the face Then move on to the temple sections. Curl the face framing locks on the brush as you do when curling your hair on a hair roller (see the picture). Heat the lock with hot air flow, and to fix the result, treat it with cold air
This is a wonderful hairstyle that looks very elegant and carries a light vintage touch. It would be perfect for all your classic and stylish looks where you need to appear consistently and impressively. If you are too young, it may make you look two years older (our model is 22). So, if thats your goal, dont hesitate to adopt the idea. At the same time, older ladies over 25 will start to feel and look perfectly harmonious, wearing very short clothes. Its a kind of hairstyle referred to as “hair from hair”. And you can see for yourself how the light beauty of its appearance is revealed through the lines framing the face. It is recommended for round and square faces. Side locks and curly locks, covering the cheeks, hide the width of wide faces, making them visually smaller. And certainly, ladies with oval faces can choose this “do without further thought”. How do we do it at home? Short step-by-step hair styling lessons Step 1: Correct hair partitioning to achieve the quality of design from this wonderful hairstyle, you need to start with a section of your locks. Proper hair embodiment is the guarantee of your success, even if you are working on a hairstyle at home. So, divide your head into the following four sections: the crown section in the shape of a U (passing over the top point of your head) two sections for the temple, taking into account your natural parting (if you wear a center parting, divide your locks in the center; with a side parting there, turn to the right or left) Step 2: Design using a round brush blow dryer Start pulling your locks, when drying, using a round brush blow dryer. To perform this procedure correctly, you need to start from the edge line of the crown section and move step by step towards the crown. When drying your hair, the brush should mimic the curve of your head. In this case, you will get a high-quality hairstyle. Step 3: Lock lock according to the design for the crown section Release the U-shaped section and dry it using the same lock as the crown section. Step 4: Designing face locks – framing the face Then move on to the temple sections. Curl the face framing locks on the brush as you do when curling your hair on a hair roller (see the picture). Heat the lock with hot air flow, and to fix the result, treat it with cold air. To treat